Sections on this page:
- (First time) login via M365
- Requirements to authenticate against seppmail.cloud
- Elements for M365 in the seppmail.cloud GUI
 (First time) login via M365
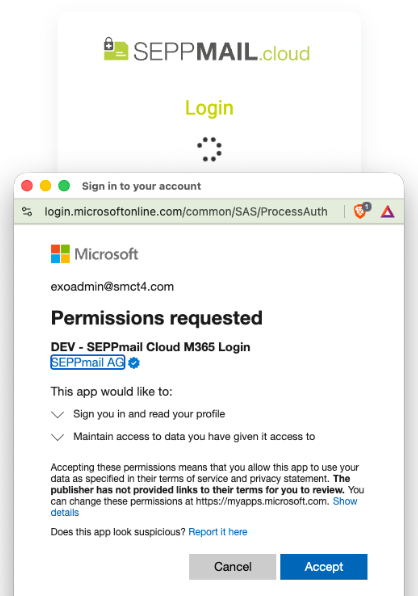
- In the login mask, click Continue with M365. A Microsoft popup opens, asking the user to sign in with the M365 account.
- Enter the email address.
- Enter the password.
- If configured by the M365 tenant admin, enter the 2FA.
(Note that this authentication is independent of the 2FA settings of the seppmail.cloud and outside of the SEPPmail responsibility.) - At first login, the user is asked to give permissions to the SEPPmail Cloud M365 Login.
Click Accept to confirm.
Requirements to authenticate against seppmail.cloud
A number of requirements have to be met in order to authenticate against seppmail.cloud via M365.
- seppmail.cloud only accepts business Microsoft accounts, not private or consumer accounts.
- The so-called primary SMTP address of the M365 user must match exactly the email address of the user in seppmail.cloud. (This is also why the consent step during the M365 login popup is necessary, because SEPPmail has to read the primary SMTP address of that M365 user to compare it against the seppmail.cloud database).
- The M365 tenant admin must allow that their M365 users have the permissions to give consent to 3rd-party applications like the seppmail.cloud application. The request for permission needs to be accepted during the first login via M365, see above.
- There is a new Extended Field setting called Enable Login via M365. Per default, it is switched to on, meaning that every user can sign in via this option. This default can be overruled by the settings for the domain and the internal user, see below.
Elements for M365 in the seppmail.cloud GUI
The following GUI elements and settings are relevant:
- On the login page: Continue with M365
- On Setup > General: Enable login via M365 for the domain
- On User Management > Internal users: Enable login via M365 for the user